This tutorial shows how to inject dependencies to Spring beans using Constructor Dependency Injection method.
1) Spring-framework-3.0.6.RELEASE
2) Eclipse Java EE IDE Helios Release (Eclipse version 3.6)
3) Java SE 6
Note: The Spring 3.0 requires at least Java 1.5.
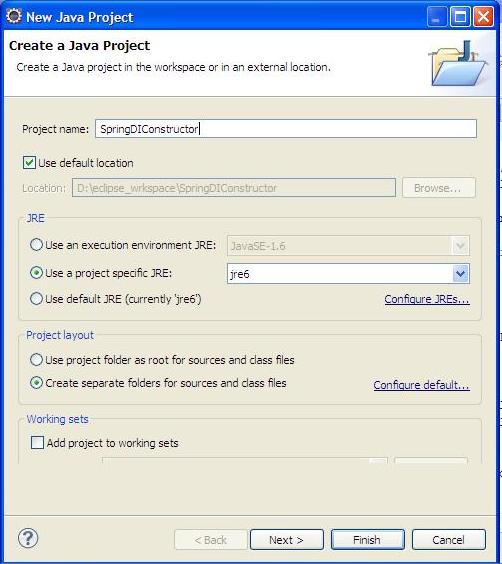
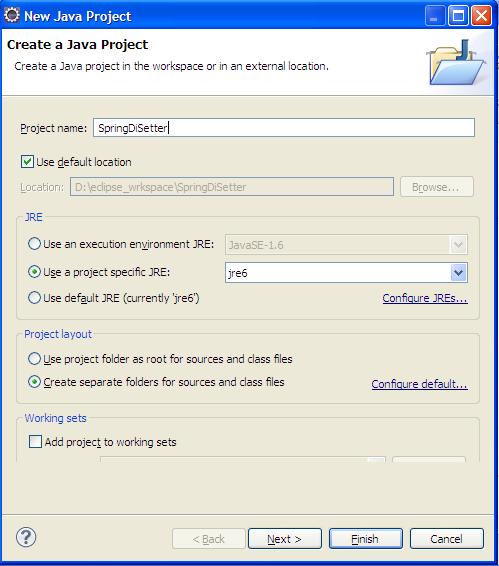
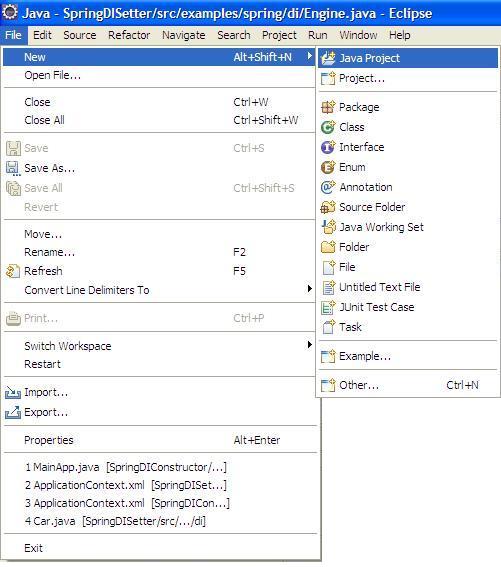
Step 1: Create a new Project in eclipse.
Create a new project in eclipse by going to File > New > Java Project and name it as SpringDIConstructor as shown in following figure.
Project structure in eclipse is shown below:

There are four files used in this program:
1) Car.java
2) Engine.java
3) MainApp.java
4) ApplicationContext.java
Create these files in eclipse. If you want to see in detail how a basic Spring project is created in eclipse, you can refer here.
Step2: Add the source code.
Add the following source code in eclipse.
Car.java
package examples.spring.di;
public class Car {
private String make;
private String model;
private int year;
private Engine engine;
/*Dependency Injection by Constructor*/
public Car(String make,String model,int year,Engine engine){
this.engine=engine;
this.model=model;
this.make=make;
this.year=year;
}
public void setMake(String make){
this.make=make;
}
public String getMake(){
return make;
}
public void setModel(String model){
this.model=model;
}
public String getModel(){
return model;
}
public void setYear(int year){
this.year=year;
}
public int getYear(){
return year;
}
public void setEngine(Engine engine){
this.engine=engine;
}
public Engine getEngine(){
return engine;
}
public void showCarDetails(){
System.out.println("Car Details:");
System.out.println("Make="+getMake());
System.out.println("Model="+getModel());
System.out.println("Year="+getYear());
engine.showEngineDetails();
}
}
Engine.java
package examples.spring.di;
public class Engine {
private String engine;
private String maxPower;
private String engineLocation;
/*Dependency Injection by Constructor*/
public Engine(String engine,String maxPower, String engineLocation){
this.engine=engine;
this.maxPower=maxPower;
this.engineLocation=engineLocation;
}
public void setEngine(String engine){
this.engine=engine;
}
public String getEngine(){
return engine;
}
public void setMaxPower(String maxPower){
this.maxPower=maxPower;
}
public String getMaxPower(){
return maxPower;
}
public void setEngineLocation(String engineLocation){
this.engineLocation=engineLocation;
}
public String getEngineLocation(){
return engineLocation;
}
public void showEngineDetails(){
System.out.println("****Engine Details****");
System.out.println("Engine="+getEngine());
System.out.println("Maximum Power="+getMaxPower());
System.out.println("Engine Location="+getEngineLocation());
}
}
MainApp.java
package examples.spring.di;
import org.springframework.context.ApplicationContext;
import org.springframework.context.support.ClassPathXmlApplicationContext;
public class MainApp {
public static void main(String args[]){
ApplicationContext ctx=new ClassPathXmlApplicationContext("resources/ApplicationContext.xml");
Car car=(Car)ctx.getBean("myCar");
car.showCarDetails();
}
}
ApplicationContext.java
<?xml version="1.0" encoding="UTF-8"?>
<beans xmlns="https://www.springframework.org/schema/beans"
xmlns:xsi="https://www.w3.org/2001/XMLSchema-instance"
xsi:schemaLocation="https://www.springframework.org/schema/beans
https://www.springframework.org/schema/beans/spring-beans-3.0.xsd">
<bean id="myCar" class="examples.spring.di.Car">
<!-- Injecting primitive values as Dependencies-->
<constructor-arg name="make" value="Maruti Suzuki"/>
<constructor-arg name="model" value="Wagon R"/>
<constructor-arg name="year" value="2012"/>
<!-- Injecting reference to other bean as Dependency-->
<constructor-arg name="engine" ref="myEngine"/>
</bean>
<bean id="myEngine" class="examples.spring.di.Engine">
<!-- Injecting primitive values as Dependencies-->
<constructor-arg name="engine" value="3664 cc"/>
<constructor-arg name="maxPower" value="304HP"/>
<constructor-arg name="engineLocation" value="front"/>
</bean>
</beans>
Step3: Add jars
You will need to add following jars to your application.
1) org.springframework.beans-3.0.6.RELEASE.jar
2) org.springframework.core-3.0.6.RELEASE.jar
3) org.springframework.context-3.0.6.RELEASE.jar
4) org.springframework.asm-3.0.6.RELEASE.jar
5) org.springframework.expression-3.0.6.RELEASE.jar
6) commons-logging-1.1.1.jar
You can download commons-logging-1.1.1.jar from here. Spring related jars can be found in dist folder of your downloaded Spring 3.0.6 distribution folder.
To add above jars right click on your project SpringDIConstructor, go to Build Path > Configure Build Path > Add External JARs... and add them one by one.
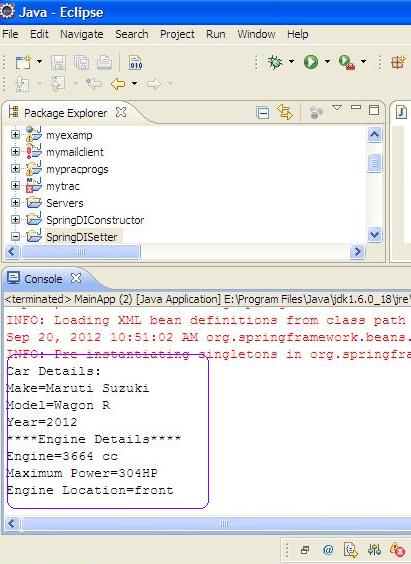
Step 4: Running the program.
Right Click on the project SpringDIConstructor and go to Run As > Java Application.
You will see the output in the Console Pane at bottom.
You will see the output in the Console Pane at bottom.

Hope this would help you!
I would like to know your comments and if you liked the article then please share it on social networking buttons.


